How to Build an Interactive Post With Your Agent in BlackOps
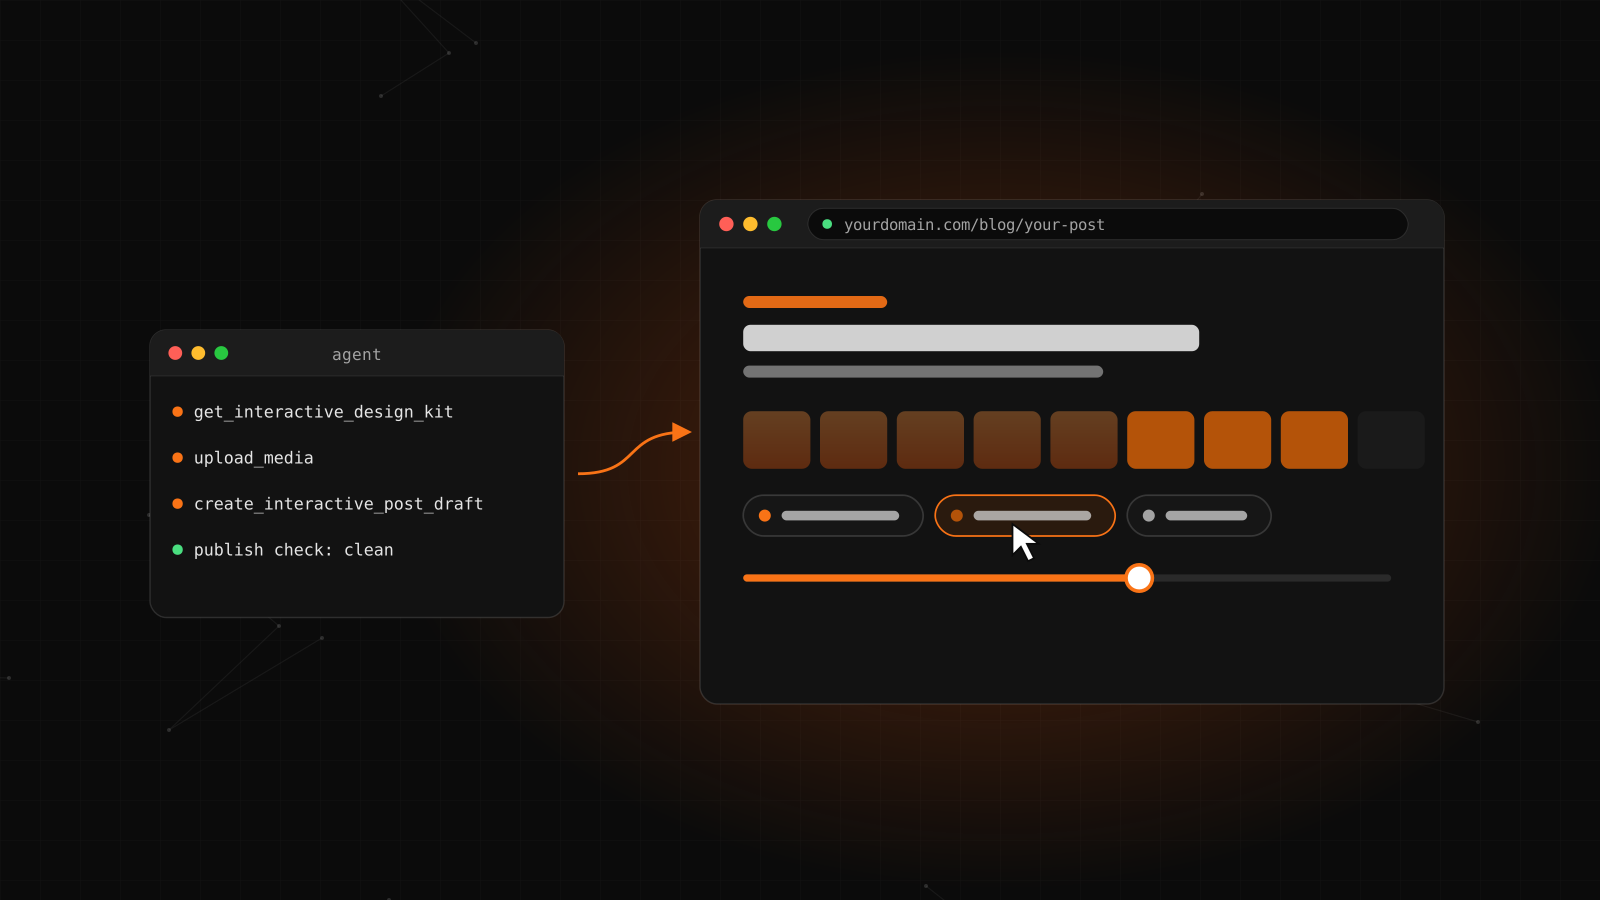
Your agent builds a full HTML page from your site's design kit. You preview it on your own domain and publish it.
Most blog posts are words and pictures, and most of the time that's exactly right. Some ideas land better when the reader can do something: move a slider and watch a total change, tap a category and see a chart filter, step through a story with a video in the middle of it.
Interactive Posts let your agent build that kind of page for you. It writes the post as a full HTML page in your site's colors, fonts and voice, sends it to BlackOps over MCP, fixes whatever the publish check flags, and hands you a preview on your own domain. Nothing goes live until you approve it and publish it.
This guide walks through a real build from the first prompt to the Publish button. After that we show four more kinds of interactive posts you can ask for, with a prompt for each.
What an interactive post is
An interactive post is a blog post your agent builds as a full HTML page instead of markdown. BlackOps serves it inside your site, so readers see your header and footer, then the post's title and summary, then the page itself.
We also build a Text version of every interactive post from the headings, paragraphs, lists and image alt text in the HTML. That text is what search engines, link previews, RSS, listings and screen readers get. The words of the post still matter as much as the interactive part.
Before you start
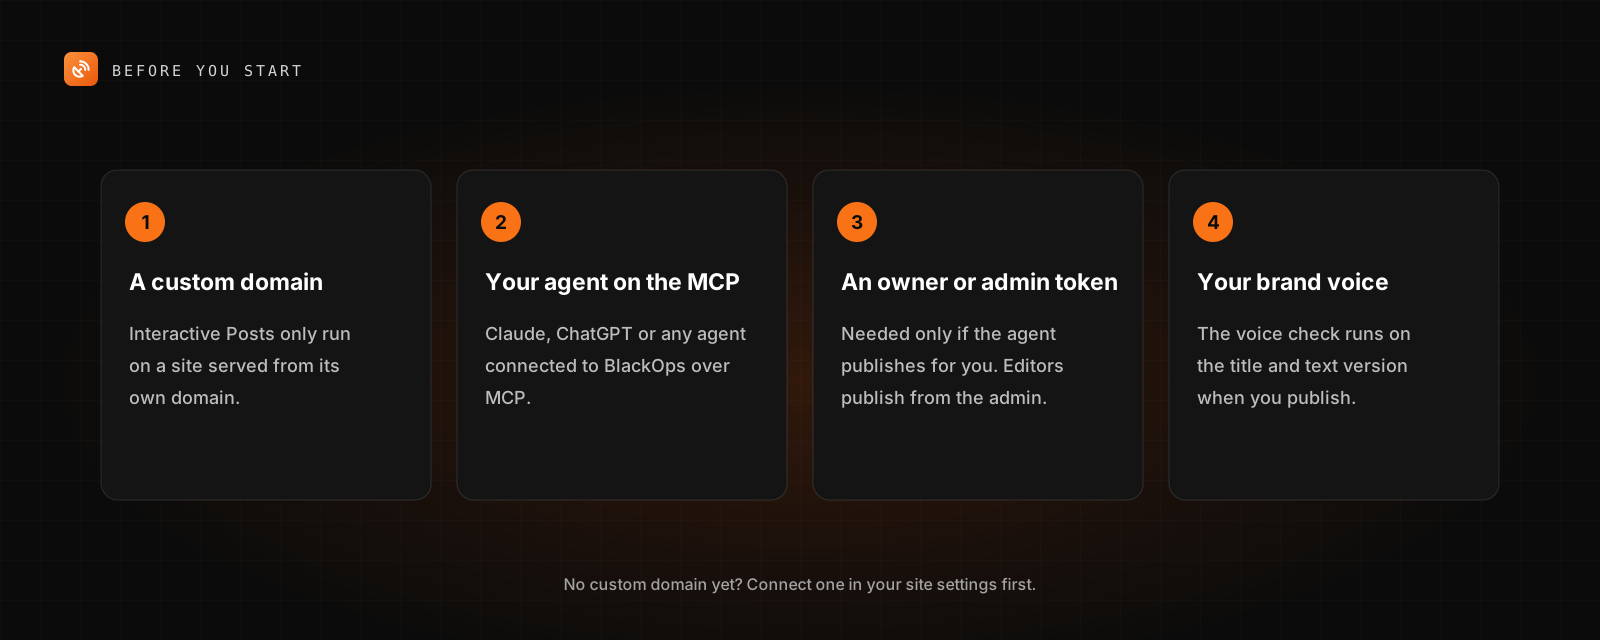
Four things need to be in place:
- A custom domain. Interactive Posts only run on a site served from its own domain. On a site's blackopscenter.com address, the post page links to the custom domain instead. If you haven't connected one yet, do that in your site settings first.
- Your agent connected to BlackOps over MCP. Claude, ChatGPT or any agent that speaks MCP works, and the MCP setup guide takes a couple of minutes.
- An owner or admin connection, if you want your agent to publish for you. Editors can still publish from the admin panel.
- Your brand voice. The brand voice check runs on the title and the Text version when you publish, the same as it does for your other posts.
How the build works, end to end
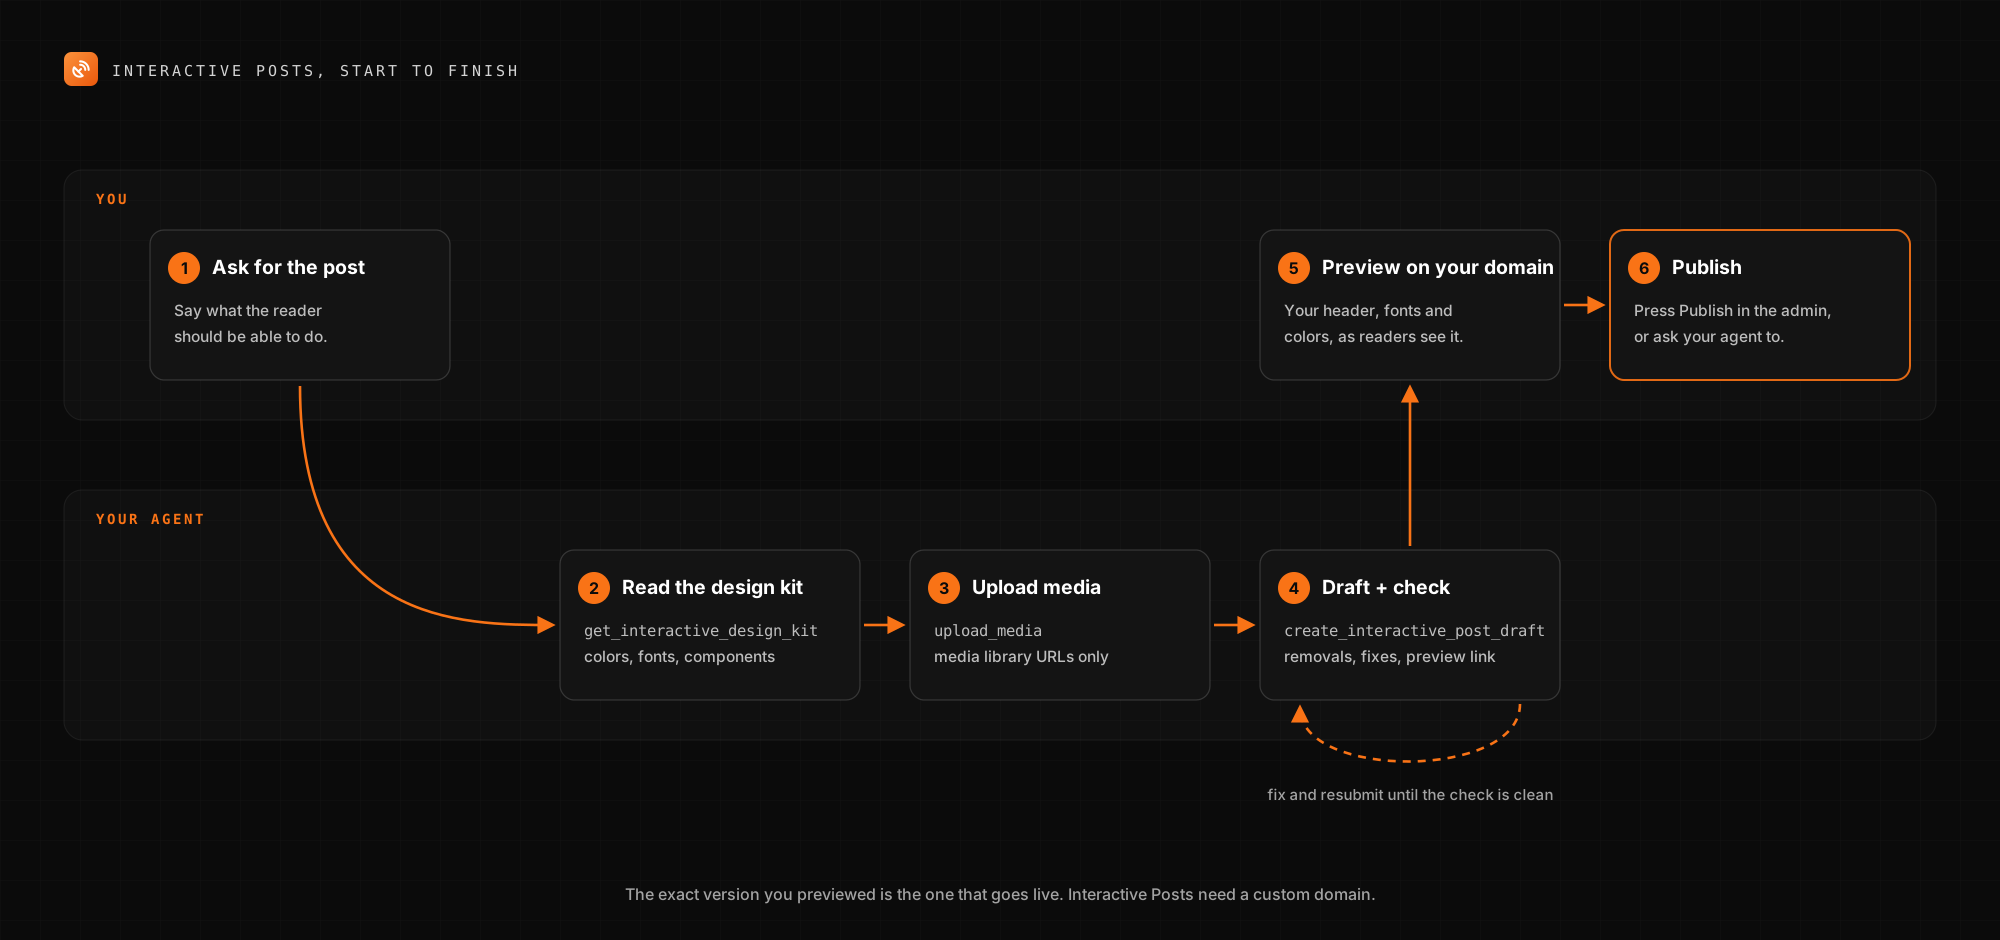
There are six steps, and you only handle the first and the last two. Your agent does the middle: it reads your design kit, uploads media, submits the draft and fixes it until the publish check is clean.
Step 1: Ask for the post
Ask for an interactive post the same way you'd ask for any draft, with one difference. Describe what the reader does, not only what the post says. "Readers move a slider and the total updates" gives your agent something to build. "Make it interactive" doesn't.
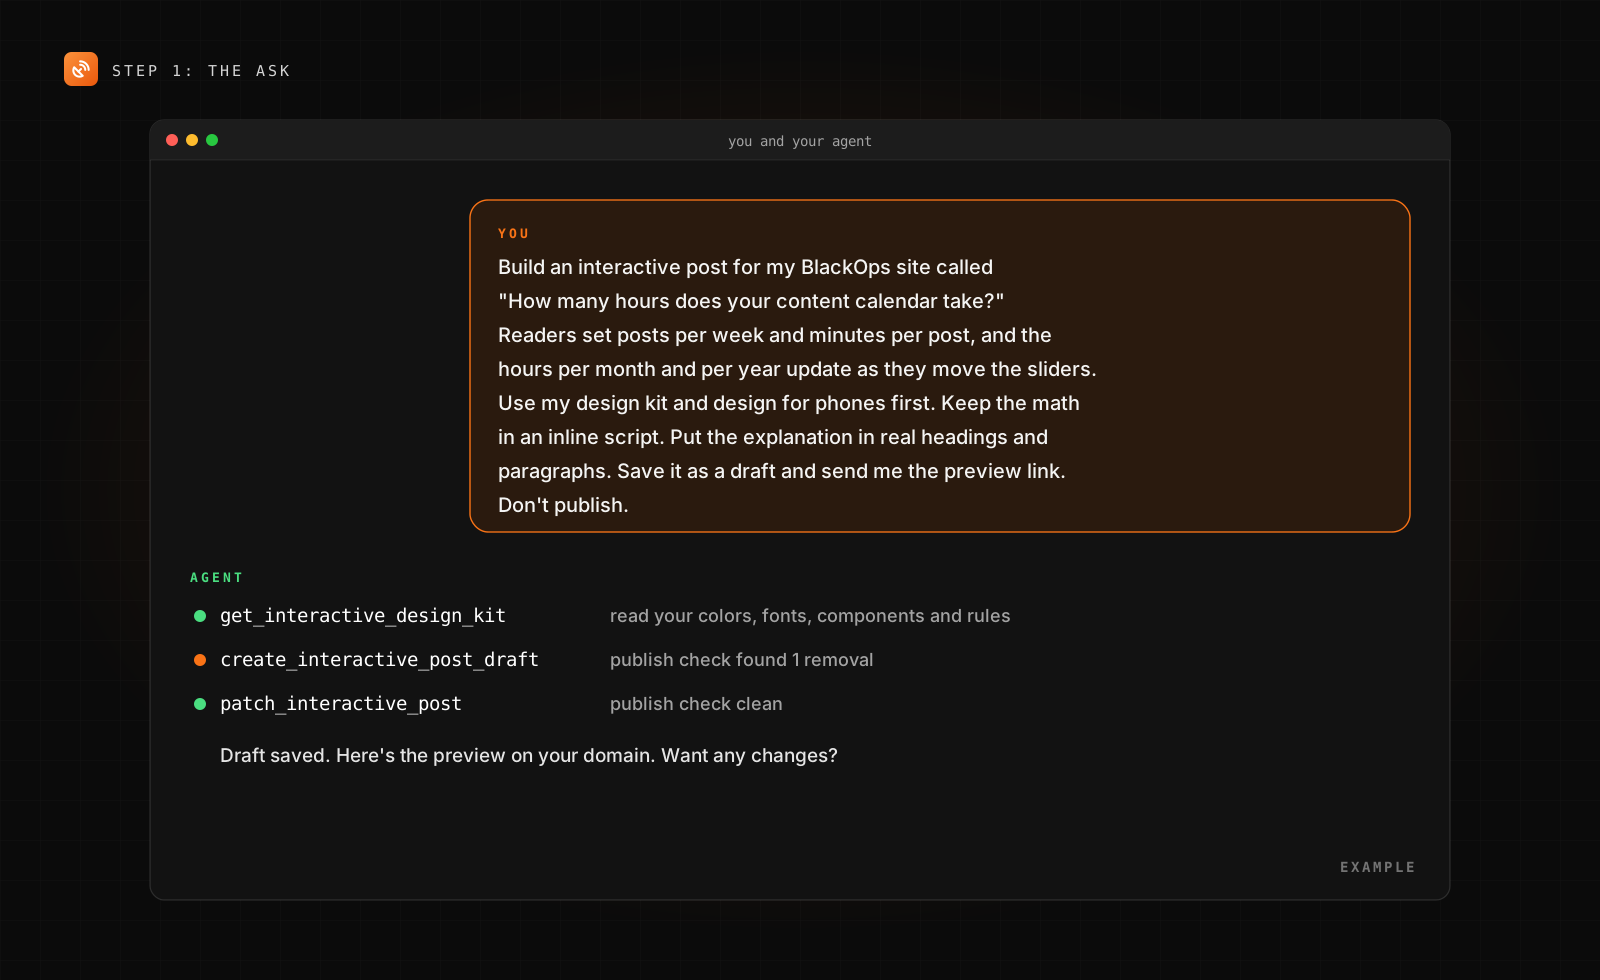
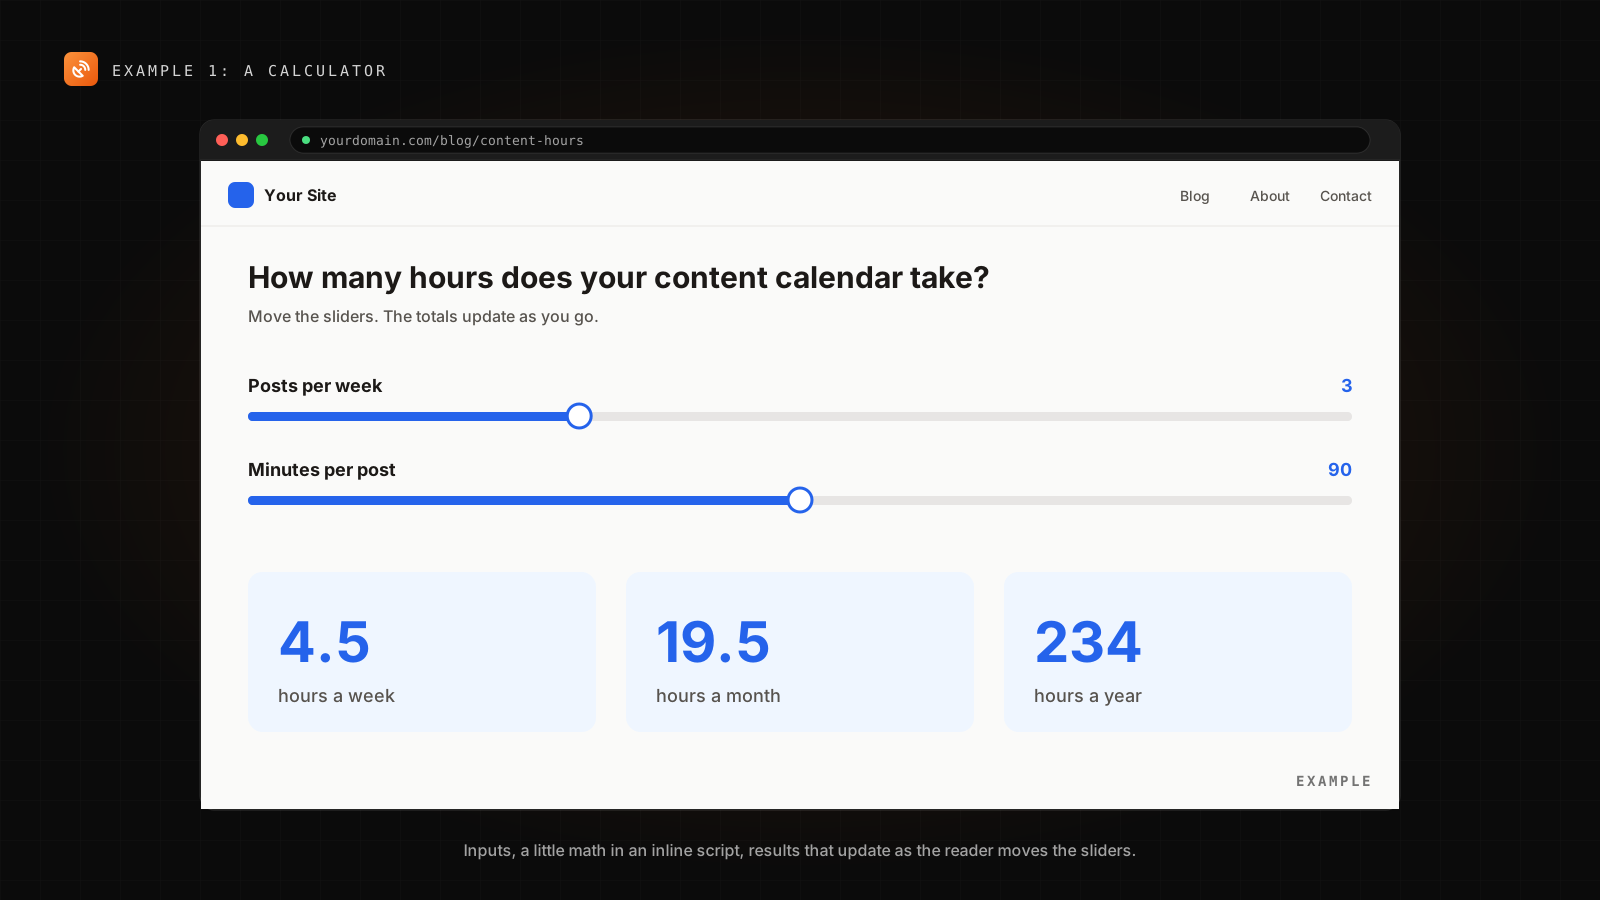
Here's the prompt for the example this guide follows, a calculator post:
Build an interactive post for my BlackOps site called
"How many hours does your content calendar take?"
Readers set posts per week and minutes per post, and the hours
per month and per year update as they move the sliders.
Use my design kit and design for phones first. Keep the math in
an inline script. Put the explanation in real headings and
paragraphs. Save it as a draft and send me the preview link.
Don't publish.
Each line in that prompt saves a round trip later. "Use my design kit" points the agent at your site's look before it writes any HTML. "Keep the math in an inline script" fits the sandbox, where the page can't call outside services. "Real headings and paragraphs" gives the Text version something to work with. "Don't publish" is the default anyway, because your agent publishes only when you ask it to.
You don't need to name any tools. The Interactive Posts tools sit in the full BlackOps catalog rather than the default set, and your agent finds them with describe_tools and calls them with use_tool.
Step 2: Your agent reads the design kit
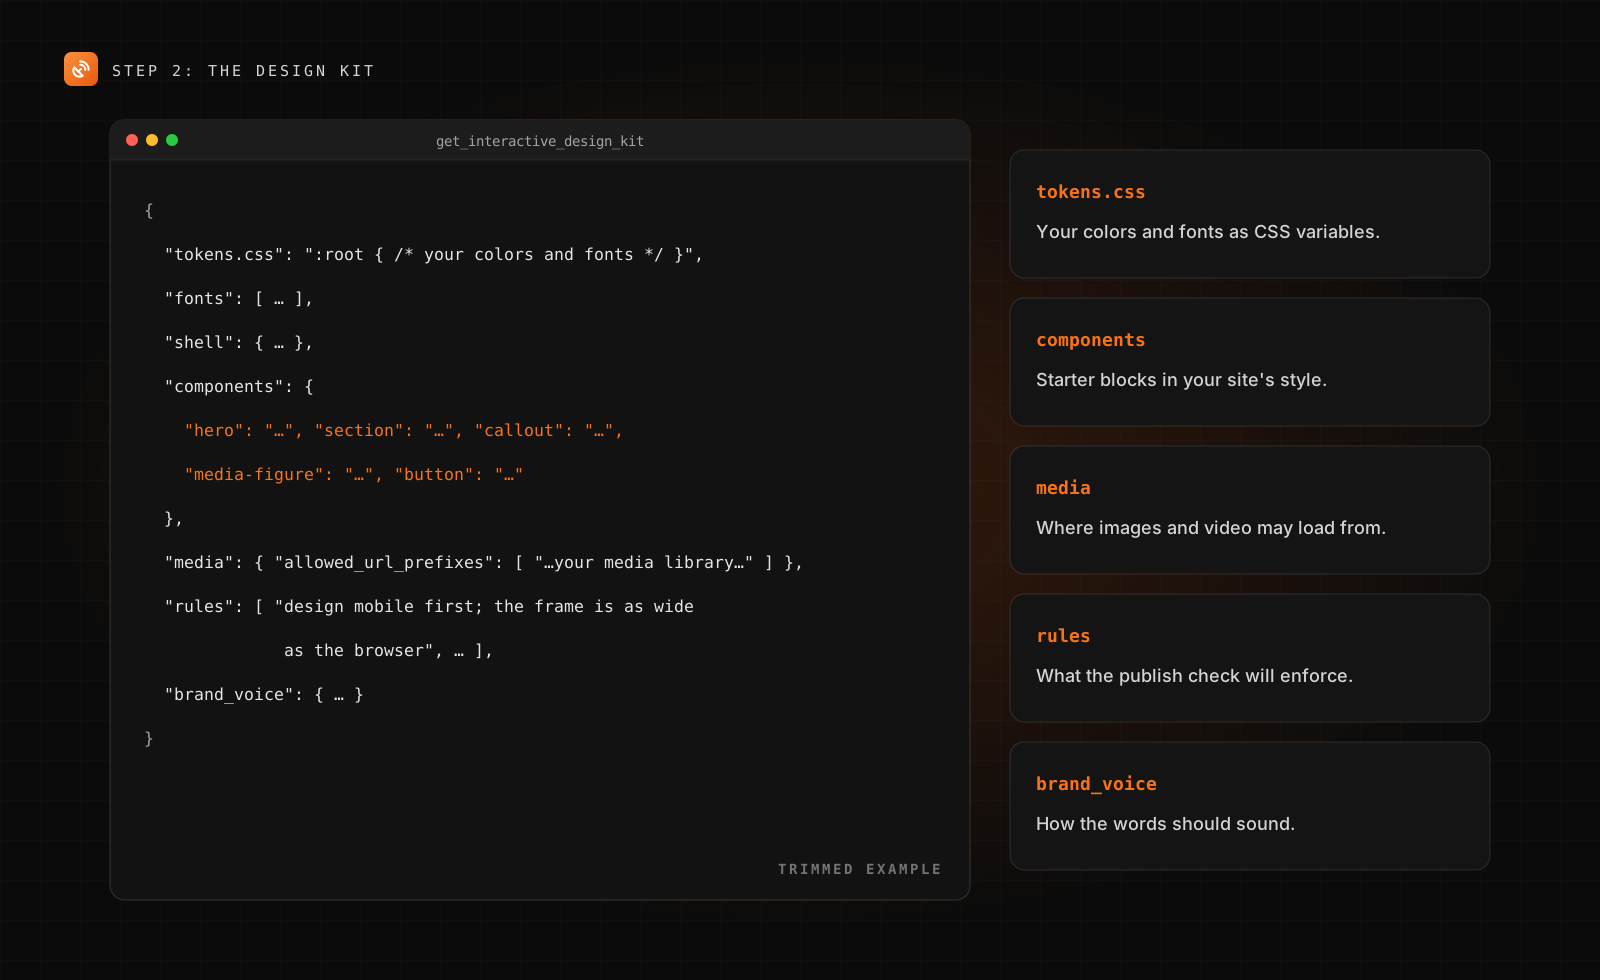
Before it writes anything, your agent calls get_interactive_design_kit. That returns everything the page needs to look like it belongs on your site: your colors and fonts as CSS variables, starter components for a hero, a section, a callout, a media figure and a button, the address of your media library, your brand voice, and the rules the publish check enforces. One of those rules sums up the layout brief: "design mobile first; the frame is as wide as the browser."
The page runs in its own sandboxed frame on the post page, so ask your agent to put the design kit's tokens in the page itself. That way the page picks up your colors and fonts directly.
Step 3: Media goes to your media library first
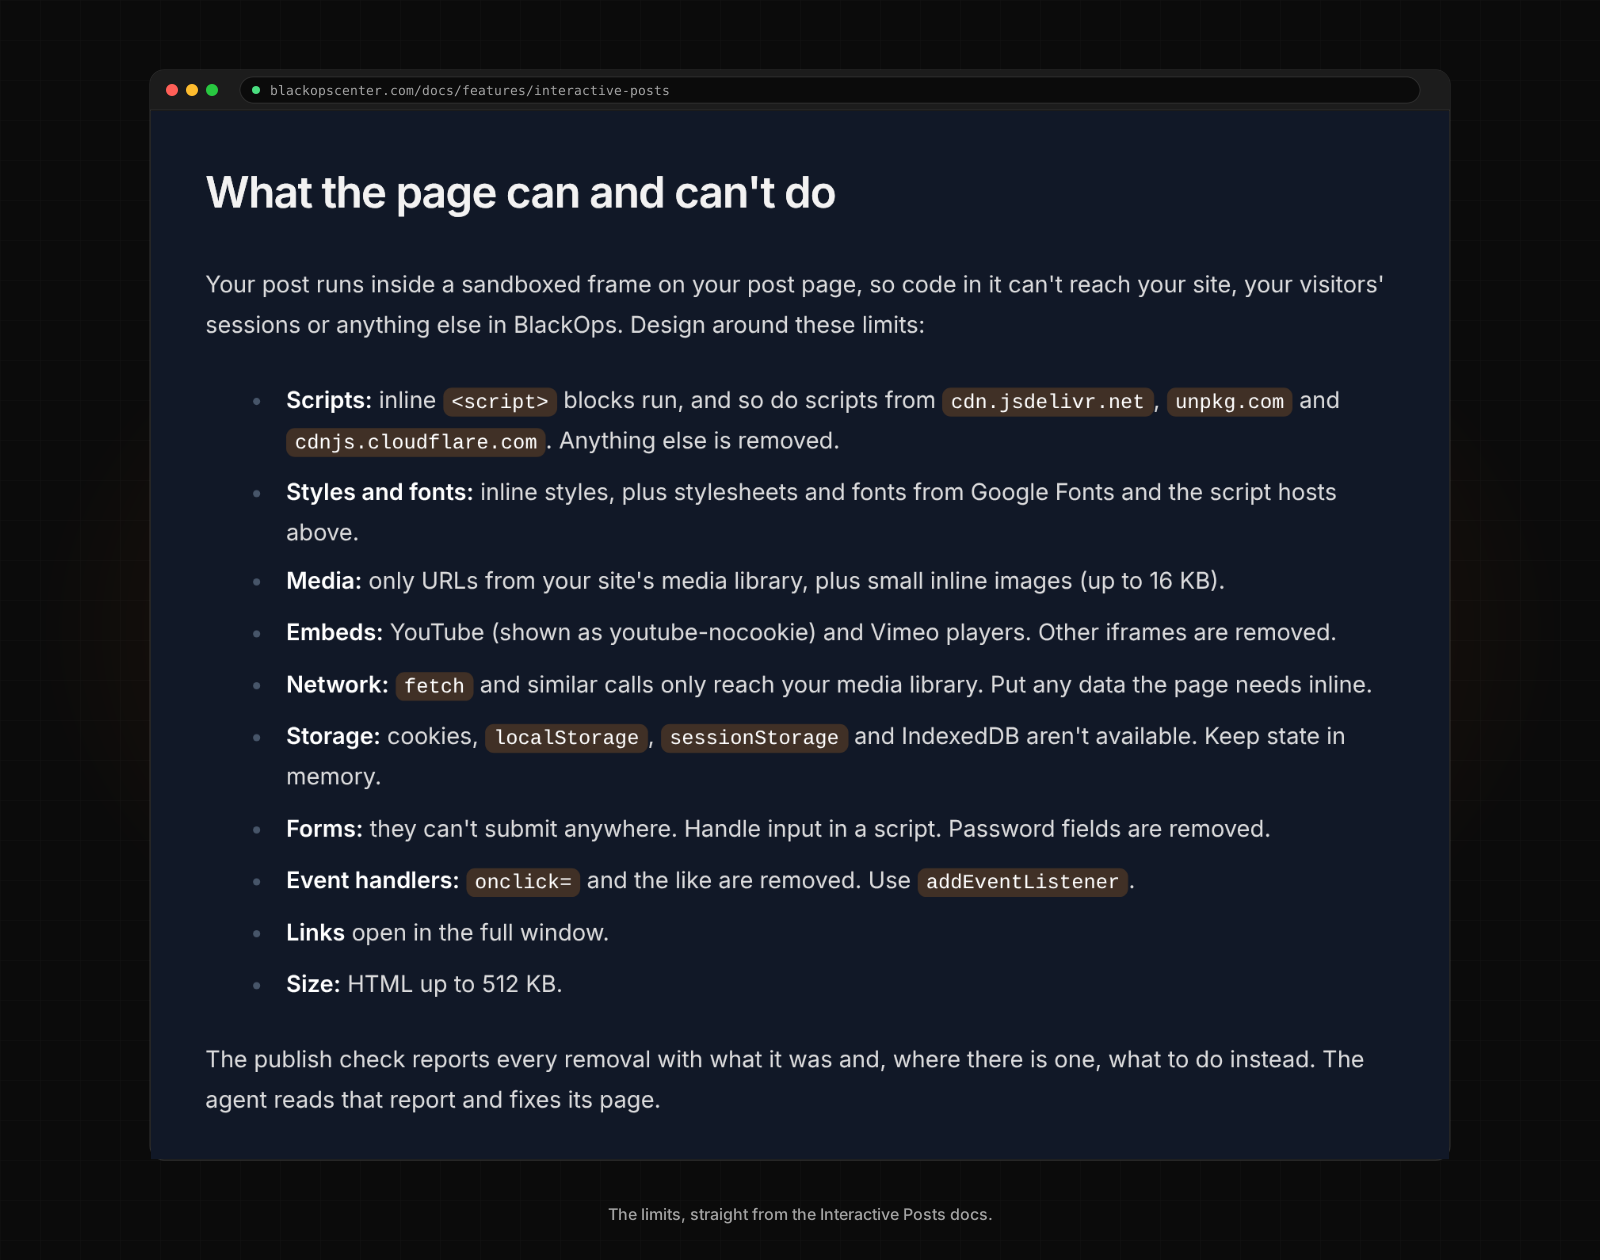
Images and video upload to your media library before the page is built, and the HTML points at those URLs. The page can't load media from anywhere else, apart from small inline images up to 16 KB. Keeping media in the library also keeps the page under the 512 KB size limit.
For video, the page can embed YouTube (shown as youtube-nocookie) and Vimeo players. Other iframes are removed.
Step 4: Your agent submits a draft and fixes what the check finds
create_interactive_post_draft takes the HTML with a title, a one-line summary and an optional share image from your media library, plus a slug, tags and SEO fields if you want them. BlackOps runs the publish check, saves the draft, and returns what it removed, what to do instead and a preview link.
If anything was removed, your agent fixes the HTML and resubmits with patch_interactive_post. It repeats that until the check comes back clean.
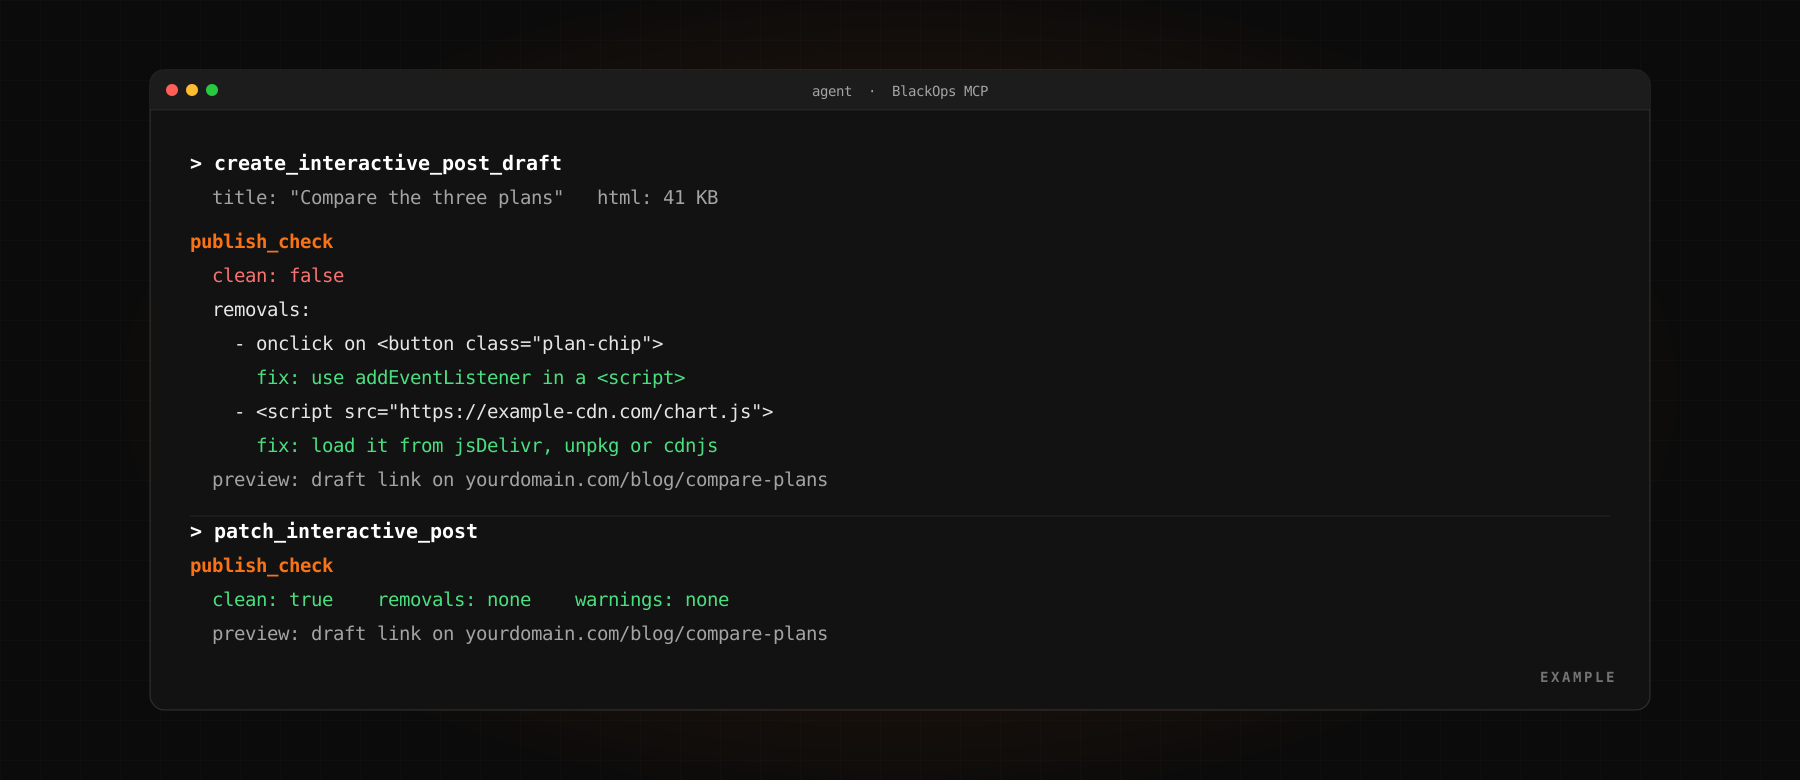
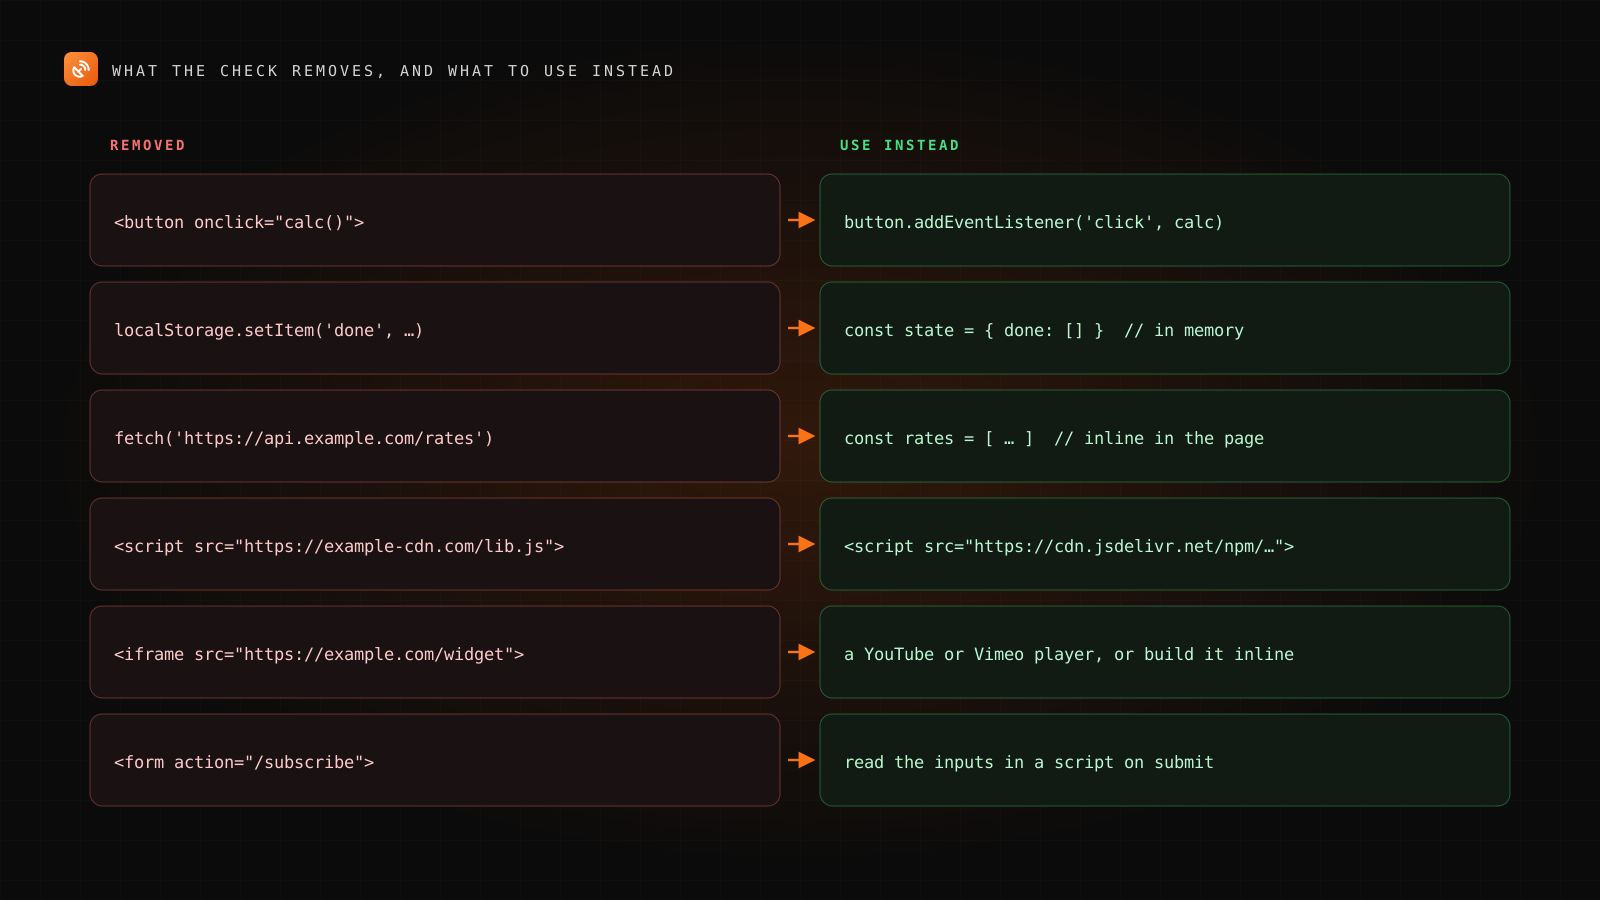
Most removals come from the same handful of habits, and each has a small fix. Inline handlers like onclick= are removed, so the page uses addEventListener in a script. Cookies, localStorage, sessionStorage and IndexedDB aren't available, so state lives in memory. Network calls only reach your media library, so the data goes inline. Scripts run inline or from cdn.jsdelivr.net, unpkg.com and cdnjs.cloudflare.com, so libraries load from one of those. Forms can't submit anywhere, so a script reads the inputs instead.
Step 5: Review the preview on your domain
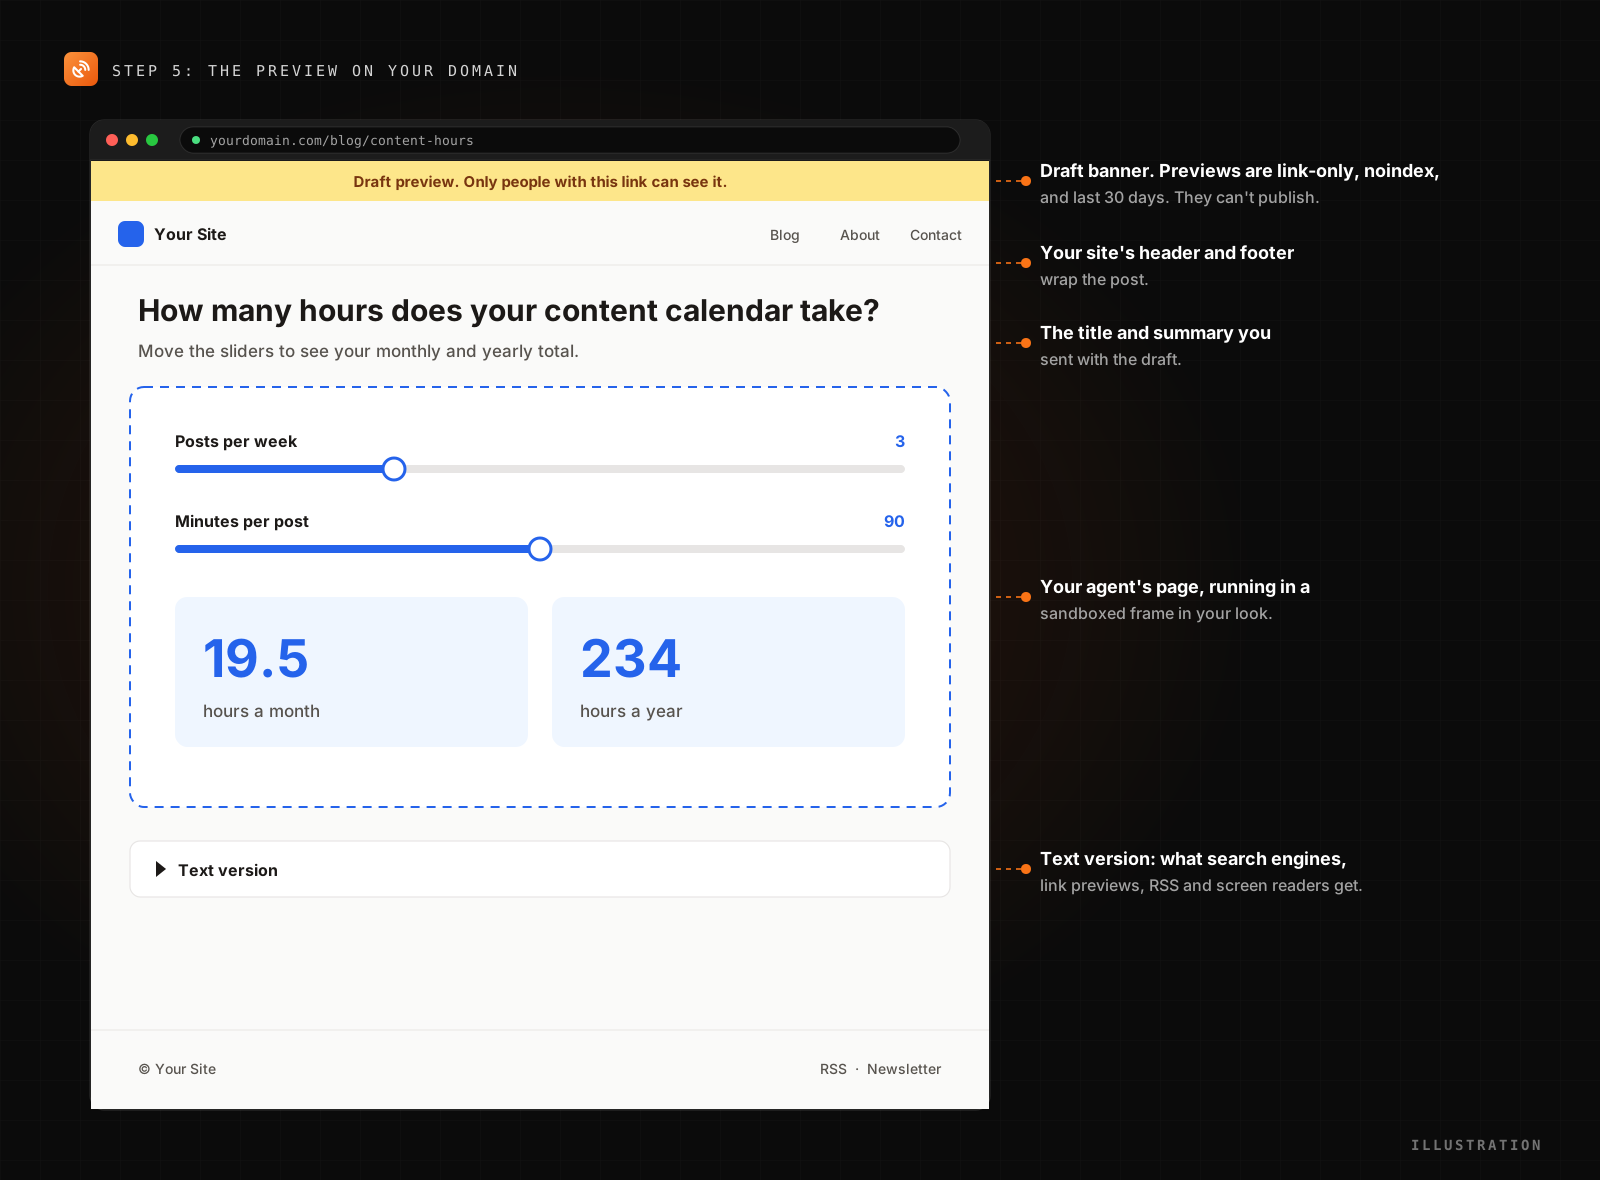
The preview link opens the draft on your real site, so you see it the way readers will: your header and footer, the title and summary, the page in your fonts and colors, and the Text version below it.
Previews are only reachable with their link, are marked noindex and show a banner saying they're a draft. Preview links last 30 days, and they can't publish anything. If one expires, your agent gets a fresh link the next time it updates or reads the post.
This is the step to be picky. Open it on your phone. Move every slider and tap every button. Open the Text version and read it on its own. If anything is off, tell your agent what to change and it patches the draft.
Step 6: Publish it
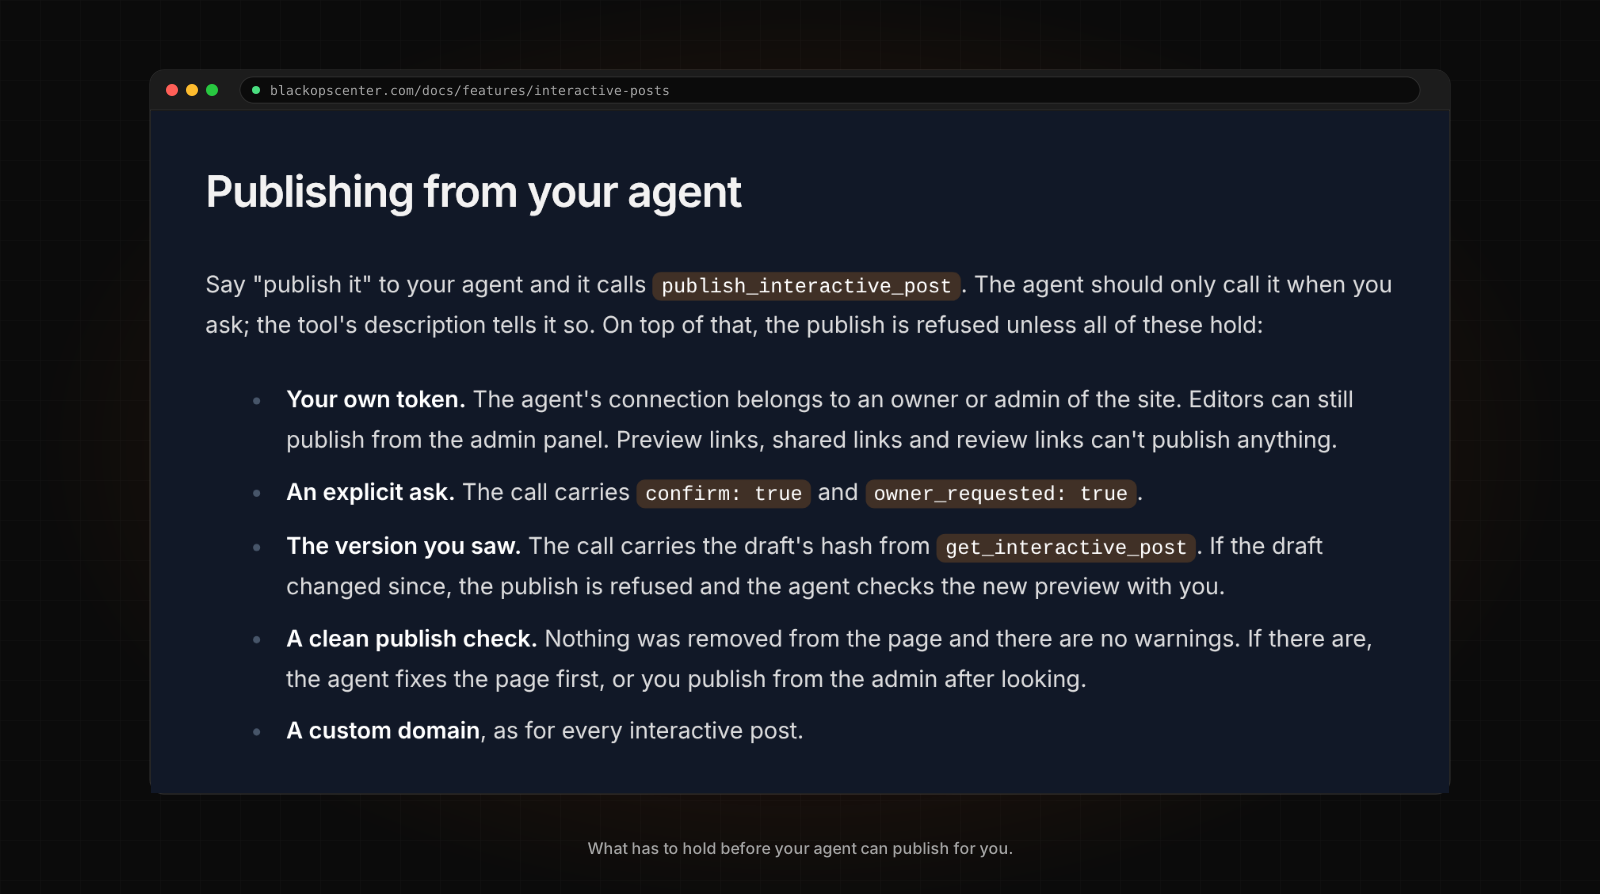
When the preview looks right, you can publish two ways. Open the post in the BlackOps admin and press Publish, or tell your agent "publish it." Both publish the exact version you previewed. If the draft changed after you looked, the publish is refused and you look again. The brand voice check runs either way, and if it fails you see why and can revise or publish anyway.
When your agent publishes, a few more things have to hold. The connection belongs to an owner or admin of the site, the call carries an explicit confirmation, it names the version you saw, and the publish check is clean.
Two more things to know. Interactive Posts can't be scheduled, from the agent or the admin, so publish when you're ready. And you can unpublish from the same panel. The published copy is kept, so publishing again puts it back.
Four more interactive posts you can ask for
The calculator is one shape. Here are four more, each with a prompt you can adapt.
A filterable chart
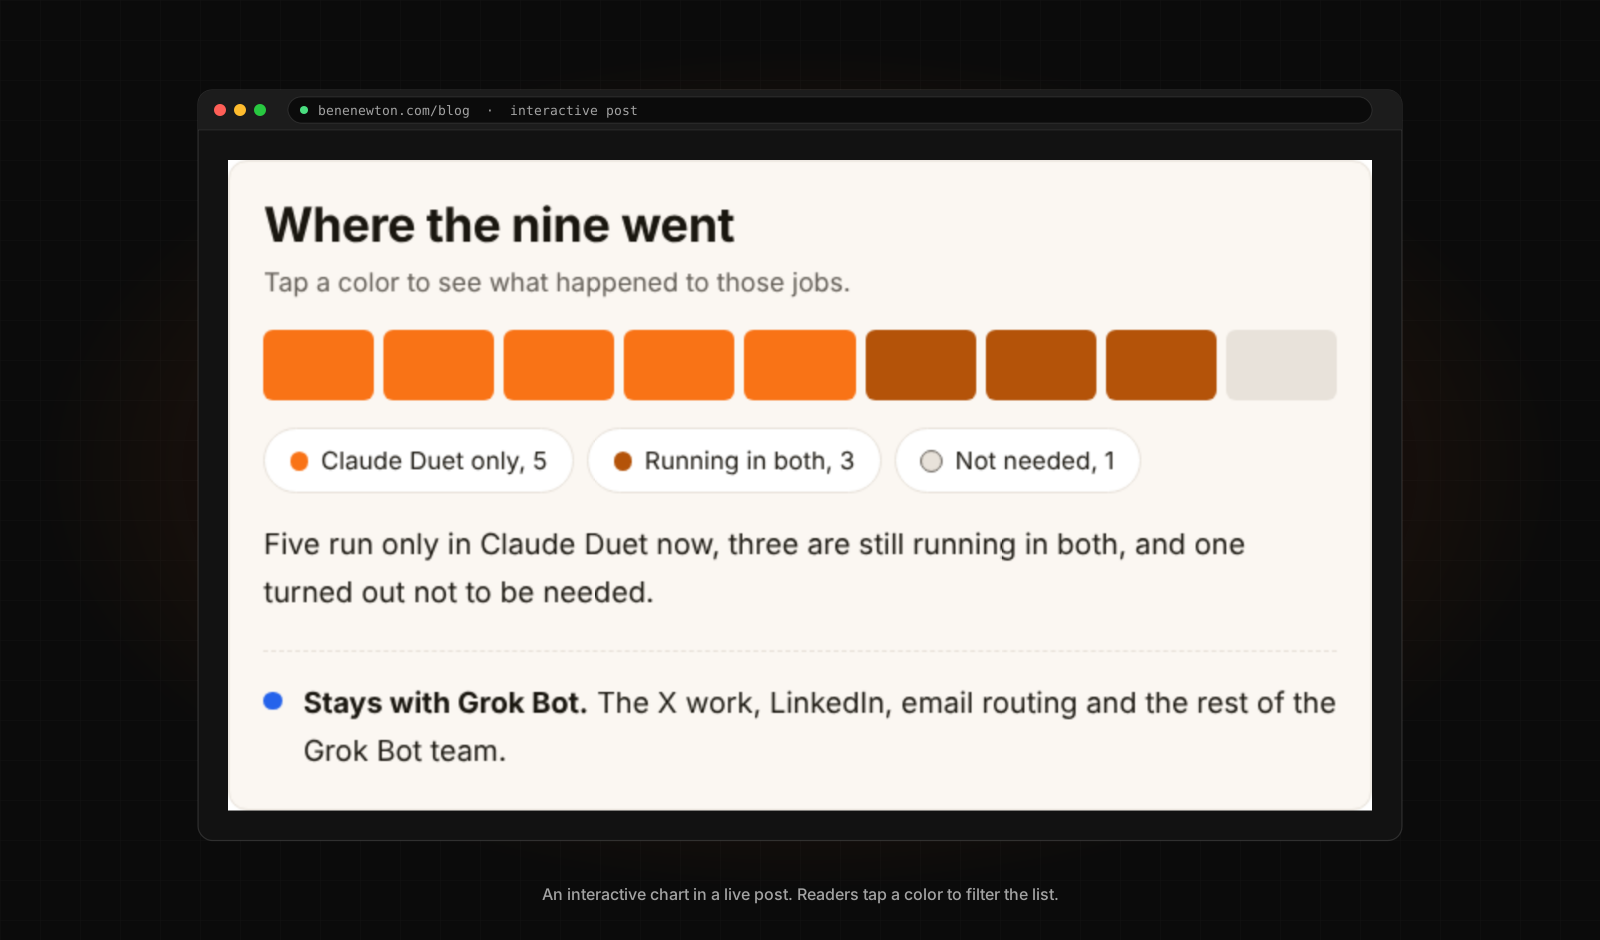
Readers tap a category and the chart and list below it filter to match. This works well for any "where did it all go" breakdown, such as time, budget, traffic sources or results by type. The chart at the top of this guide is a live example from a published post.
Build an interactive post that shows [your data] as a chart.
Readers tap a category to filter the chart and the list under it.
Put the data inline in the page. Use my design kit.
Chart libraries load fine from jsDelivr, unpkg or cdnjs, or your agent can draw the chart with plain HTML and CSS.
A scroll story with video
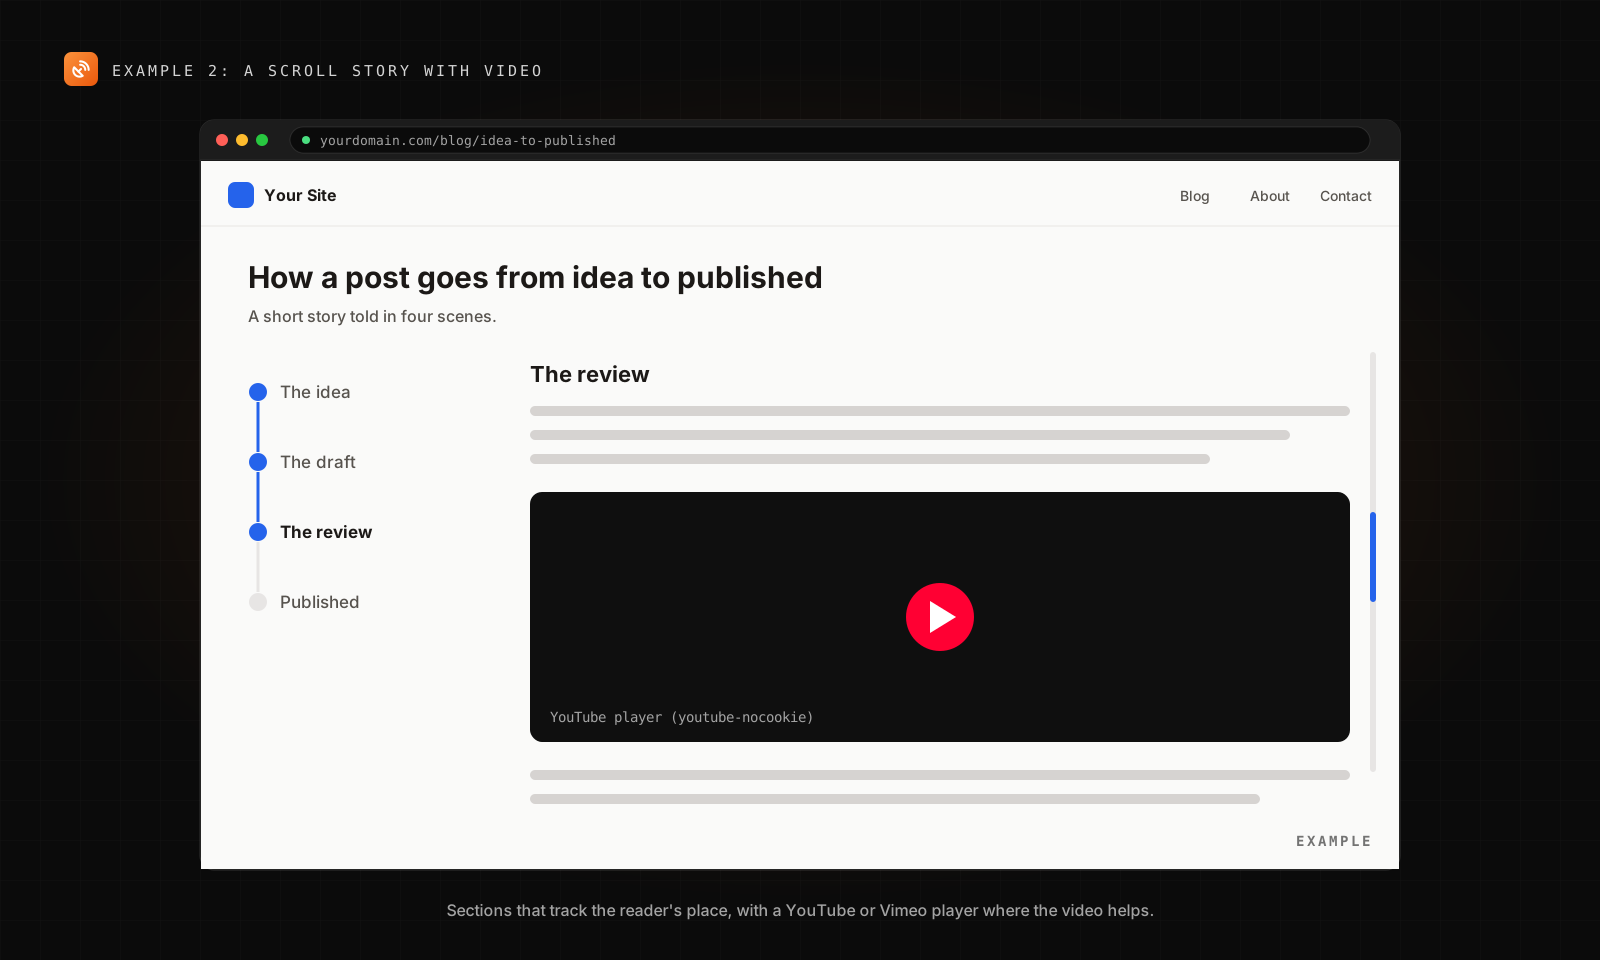
The post tells a story in scenes. A progress rail shows where the reader is, and a YouTube or Vimeo player sits in the scene where the video helps most.
Build an interactive scroll story in four scenes about [topic].
Show a progress rail that tracks the reader's place.
Embed this YouTube video in scene three: [link].
Every scene needs a real heading and paragraphs.
A comparison tool
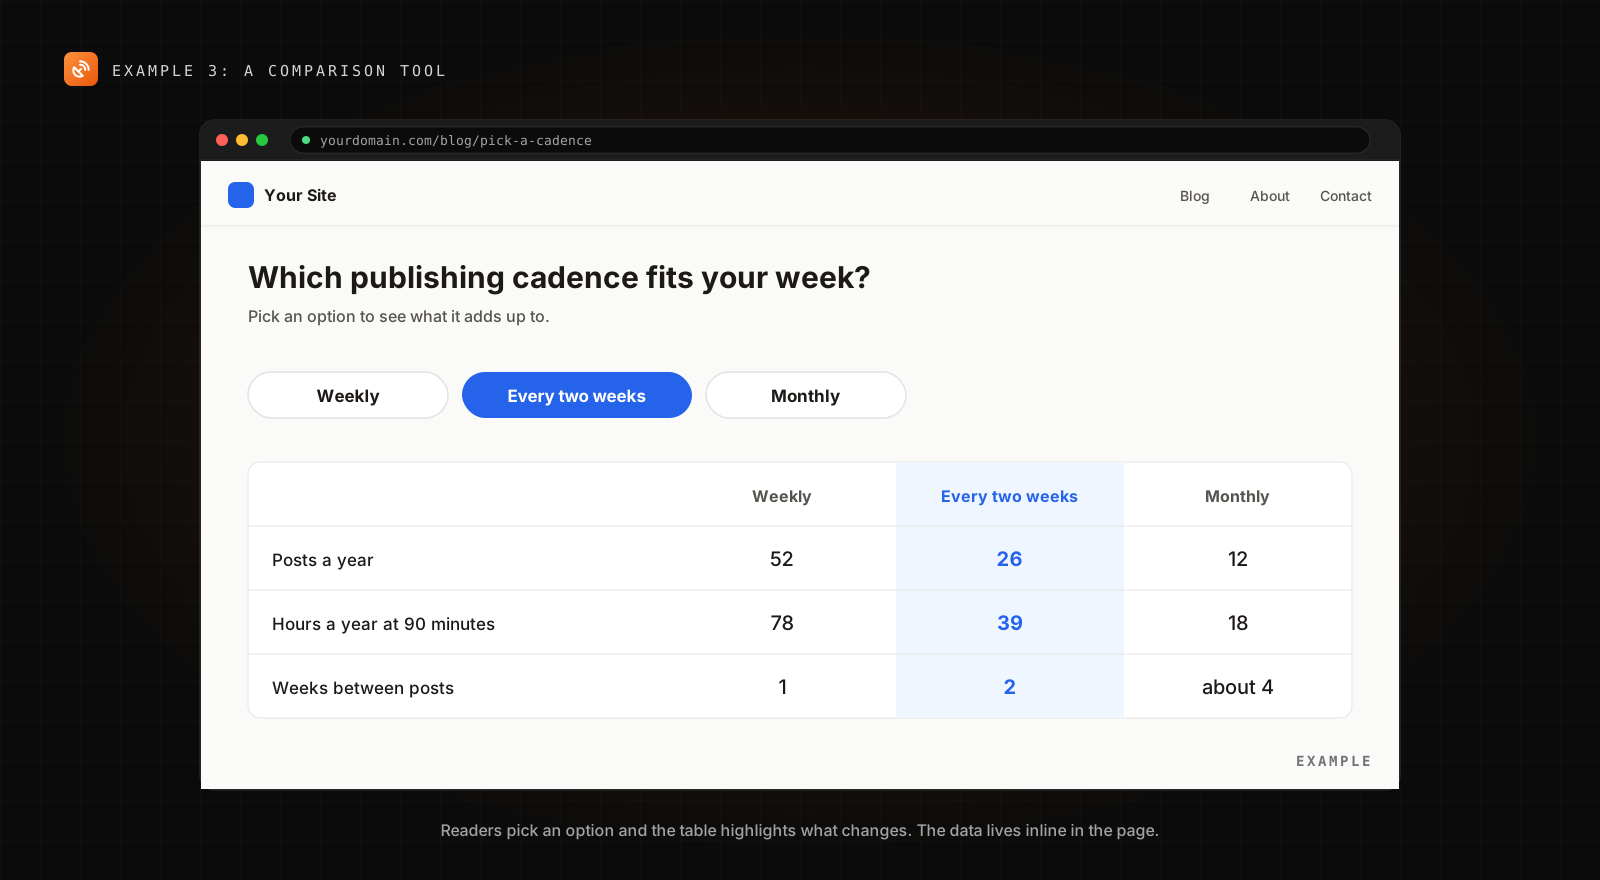
Readers pick an option and a table highlights what changes. Use it for plans, approaches, schedules or anything else your readers weigh up.
Build an interactive comparison of [option A], [option B] and
[option C]. Readers pick one and the table highlights its column.
Keep all the numbers inline in the page.
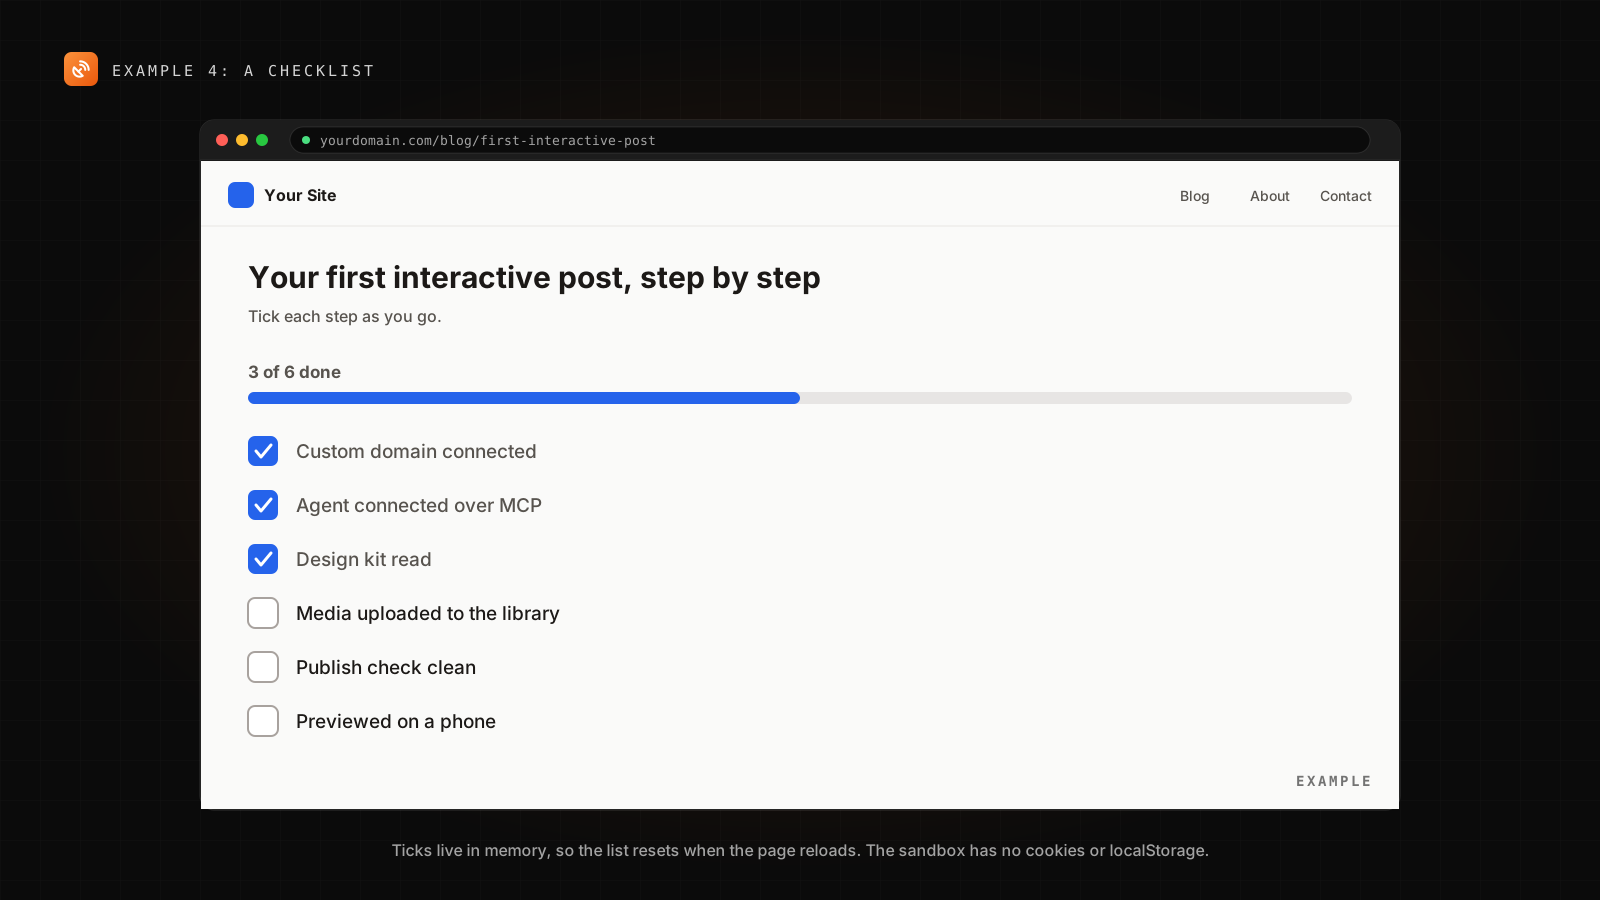
A checklist
Readers tick steps as they go and a progress bar fills. It suits launch guides, setup walkthroughs and anything with a clear order. The ticks live in memory, so the list resets when the page reloads. Say so on the page so readers aren't surprised.
Build an interactive checklist for [process] with these steps:
[steps]. Show a progress bar. Keep state in memory and add a
line saying the list resets on reload.
And here's the calculator from the walkthrough, for reference.
The limits, in one place
Give your agent these limits up front and the first draft comes back cleaner. This list is straight from the Interactive Posts docs.
Tips that save a round trip
- Describe the reader's actions. "Tap a color to filter the list" builds better than "add some interactivity."
- Hand over the data. Paste the numbers into your ask, or point your agent at a note in BlackOps, so they end up inline in the page.
- Keep the words in real text. Headings and paragraphs feed the Text version, search and link previews. Words inside images or a canvas don't.
- Write alt text for every image. It goes into the Text version too.
- Check on a phone first. The frame is as wide as the browser.
- Keep the page under 512 KB by leaving media in the media library.
When a regular post is the better choice
Most posts are still best as regular posts. An interactive post earns its place when the reader learns more by doing something than by reading about it. If you only need a callout or a styled block inside a normal post, Components in Posts adds branded components to a markdown post without building a whole page.
Either way, your agent team does the building and you approve what ships. The full reference is in the Interactive Posts docs. To see how BlackOps works on your own domain, start a trial or see plans and pricing.
Related Posts
upload_media now pulls files in by URL
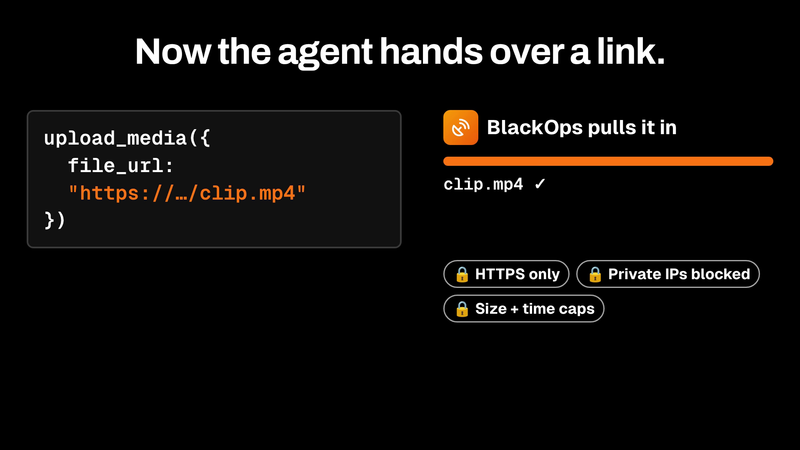
upload_media now takes a file_url. BlackOps fetches the file server-side behind SSRF guards and returns an asset ID that attaches straight to a tweet or post.
Give Claude Code Memory Across Sessions
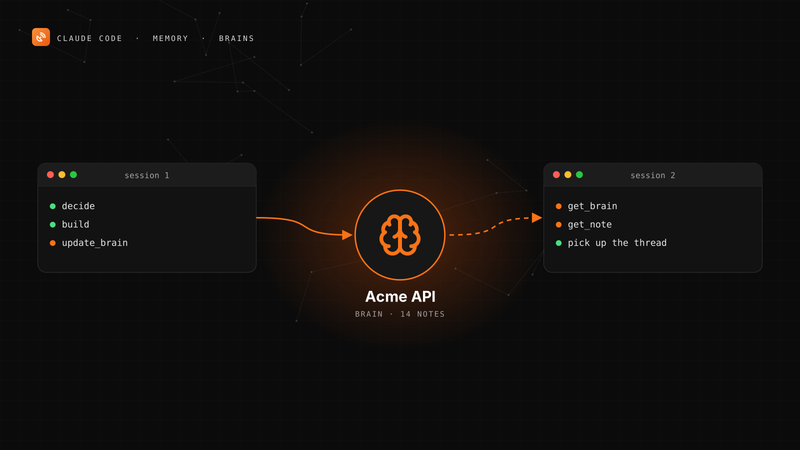
Claude Code starts every session with your code and CLAUDE.md and nothing else. Here's how to give it persistent, long-term memory with a BlackOps brain over MCP, in four steps.

Your Agent Now Asks Which Brain a Note Belongs In
When your AI agent saves a note and no single brain clearly owns it, BlackOps doesn't guess. It saves the note and puts up to three choices in front of you, with reasons, in the chat you're already in.